Create an automated search query report
Create an automated search query report
Last Updated / Reviewed : January 5th, 2025
Execution Time : 15-20 minutes

Goal : To automate your search query report using Google Sheets.
Ideal Outcome : You will be able to automatically export Search Console data into a Google Sheet which is easier to analyze and allows you to backup your data beyond 90 days.
Pre-requisites or requirements :
● You need to have the Google Search Console set up for your site. If you don’t have it, firstly check out this SOP to learn how to do it properly.
Why this is important : With Google Analytics turning evil and not showing search query data anymore, SEO managers everywhere have almost watched the apocalypse happen. The good news is that there is a safe bunker – Google Search Console. The bad news is that it doesn’t have electricity and you get kicked outside into the post-apocalyptic world after 90 days – meaning that Google Search Console is bad for data analysis and only includes 90 days of data. So it’s time to upgrade your bunker and this SOP will teach you just that.
Where this is done : Google Sheets & Search Analytics for Sheets add-on.
When this is done : You will only do this once, when you create this report. After that you will automatically get search data every month into your report.
Who does this : You or your SEO specialist do it. And your electrician 🙂
Environment setup
1. Log in into your company’s Google Search Console account.
● the “Search Analytics for Sheets” add-on
Firstly you will install the add-on. For this exercise we will use data from a site called productop10.com.
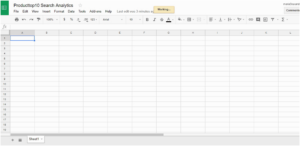
1. Open a Google Sheet and name it. This will be where ALL your reports will go, so make sure you can easily remember the name and where you’ve put it. We will name ours “Productop10 Search Analytics”.
2. In the sheet, go to “Add-ons” → “Get Add-ons”.
3. Search for “Search Analytics for Sheets”.
4. Click on it to install it. You will need to authorize this add-on with your Google Account.
Initial data pull for the last two full months
You will do an initial search data pull from the last two full months. You will only need to do this once, when you are creating the report for the first time.
The last two full months refer to the previous two calendar months.
E.g. If you are doing this in December, then you will manually need to pull data from two periods:
● October 1st – October 31st
● November 1st – November 30th
1. Click on add-ons → Search Analytics for Sheets → Open Sidebar
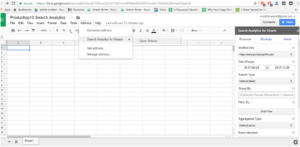
2. In the requests tab, fill in the necessary data for your website.
a. Select the website you want to pull search data for
b. Select the period (one full month, the month before the previous one)
c. In “Group By” add “Date”, “Page”, “Query”.
d. Leave the “Aggregation Type” as “Default”
e. Leave “Rows Returned” as “Everything”.
f. Leave “Results” as “Create New Sheet”.
g. Click “Request Data”
3. Now you have a new sheet which you should rename using the first 3 letters of the month + the year (e.g. “Oct 2017”)
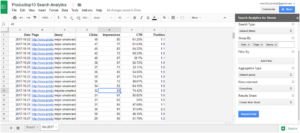
4. Repeat steps 2 and 3 for the second full month period.
5. Check out the image below to learn what data on each column in your data sheets means.
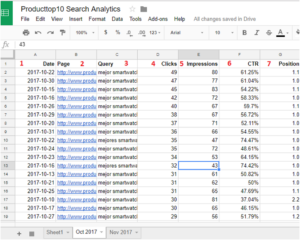
No.1 is pretty self-explanatory – the day of the search data.
No. 2 is the URL that is ranking on Google.
No. 3 is the search term for which the URL is ranking
No. 4 is an estimate of how many times the search result for that page was clicked on.
No. 5 is an estimate of how many times that page was shown on search results.
No. 6 is an estimate of the percentage of times the page was clicked on vs. how many times it was shown.
No. 7 is an estimate of the URL’s position in the search results.
Enable the backup
Now you are going to enable the backup so that you will transform this into an automated process.
1. Click on “Add-ons” → “Search Analytics for Sheets” → “Open sidebar”.
2. Go to the “Backups” tab.

3. Fill in the boxes
a. Select the website you want to pull search data for.
b. Select the monthly period.
c. Select the web search type.
d. Add “Date”, “Page”, and “Query” to “Group By” box.
e. Leave the “Aggregation Type” to “Default”.
f. Leave “Rows Returned” to “Everything”.
g. Check these two boxes below.
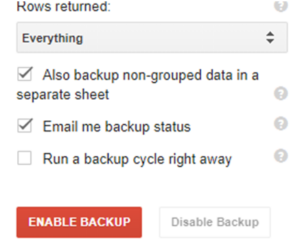
h. Click on “Enable Backup”.
You are done now. You have highly-functional bunker which means that your search query data will be automatically downloaded every month from the Search Console and into your sheet while you can sit back, relax and wait for that email notification announcing you that you have fresh data to analyse.


